Linksys Velop AC6600 Setup
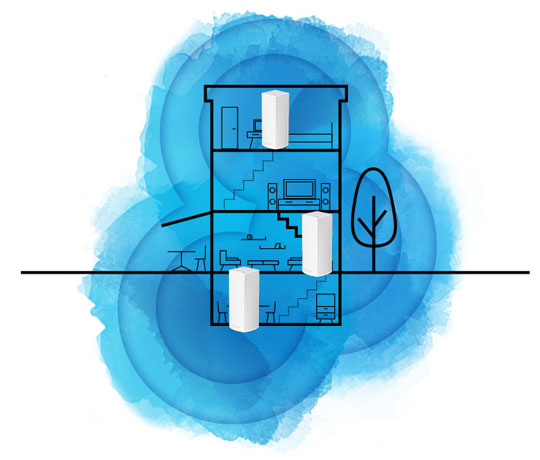
To eliminate the WiFi dead zones in the house or office, setting up the Linksys velop AC6600 Setup is a reliable option. It eliminates all your internet-related issues like buffering, slow speed and interrupted network connection. But like all other Velop mesh systems, you are required to set it up properly to get the best possible performance of this device. Although the velop configuration process is not so tricky, you can perform this by only using a device’s web browser. But, it is necessary for you to get an overview of the entire procedure to understand the key points better not only for the setup process but for future reference too. So, have a look over this detailed information on the installation methods.
Linksys Velop AC6600 Setup Product Overview
As you get the Linksys velop device, unbox it carefully to avoid any damage. Here, you will get the velop nodes, a power adapter cable, an ethernet wire, and a manual guide. Talking about its detailed information, this velop has an LED on top which shows different colours indicating different issues or stages of the velop’s working.
On its back panel, it has power, ethernet, internet, and USB ports. In addition to that, it contains a reset, WPS, and power button on the bottom. Besides that, it has a number of holes for ventilation purposes. Also, there are some inbuilt antennas in the velop setup.
Now, let’s jump to the Linksys Velop AC6600 Setup process.
Pre-Linksys Velop AC6600 Setup Steps
Before getting into the Linksys Velop AC6600 Setup process, it is crucial for you to know some pre-setup steps to make the process smoother and less time-consuming. These steps ensure that no hindrance bothers you while you attempt the configuration. Take a look below to learn about those pre-Linksys Velop AC6600 Setup steps:
Installation Through Linksys App
Through the Linksys smart app, you can perform the Linksys Velop AC6600 Setup easily and quickly with a little bit of effort. The app not only offers a seamless login process but also facilitates your regular device operations like checking the speed of the internet, how many devices are connected etc. Fortunately, you only need to launch the Linksys app on your wireless-connected device to execute the process.
Note: If you are using an apple device, then install the official app from the Apple App Store. Use your Apple ID and password and allow your iOS device to launch this. Execute the same Linksys Velop AC6600 Setup process in the end.
Configuration On Web-Based Setup Page
In addition to the Linksys app method, you can access the web-based Linksys velop AC6600 setup page to configure it. However, in this process, there will be the requirement of the velop’s web or IP address along with the login credentials. So, keep these things ready earlier and then utilize these steps later.
Hence, through these two ways, your Linksys velop AC6600 Setup’s parent node will be installed easily. Afterwards, connect more devices to it and get the highest speed of the best quality internet system without any interruptions.
Resolving Points Linksys Velop AC6600 Setup
Undoubtedly, you may get some common issues while configuring or using your velop. To eliminate them immediately, keep in mind and follow some consideration points as the troubleshooting ways.
Reset Methods For Linksys Velop AC6600 Setup
Now, when you decide to choose the reset process, select any method from two different approaches. Which are through the web interface and reset by pushing the reset button from the Velop. Both processes will discard the older settings and the Velop requires you to repeat the setup.
Reset From Web Portal
In the first method, visit the web interface of your Velop and select the Factory Reset option from there. Wait till the Velop reset its previously configured settings and ask you for the setup. Finally, set up the Velop using any of the above-mentioned approaches.
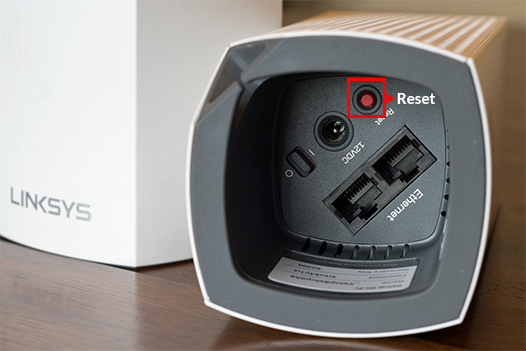
By Pressing The Button
The second and other method involves pressing the reset button from the Velop panel and holding it till the LED begins blinking. Once the LED turns stable or off, then reconfigure the Velop using the default and accurate details. Ensure to avoid mistakes in the details and set up to prevent errors further.
Linksys Velop AC6600 Setup Benefits
This Linksys Velop AC6600 Setup comes with cutting-edge technical features which provide a range of advantages to users. After installing this device, you will be able to get the strongest internet signal even in the WiFi dead zones. Evidently, your devices will remain connected to the modem and will work effectively. The interesting fact is that you can connect multiple devices to it whether it is your Smart TV or CCTV.
Therefore, with the help of the above-mentioned useful points, you can execute the Linksys Velop AC6600 Setup process easily. However, if you have any queries regarding this device, then don’t hesitate to reach us. You can contact us by making a call at +1 716-992-6371 or mailing us at support@linksys-wifi.com. Indeed, we are a doorstep away to assist you!
Some Issues You Might Face
- Velop Dropping Issue
- Fix Linksys Velop Red Light Issue
- Velop Node Keeps Going Offline
- Fix Linksys Extender No Internet Issue
- Linksys Velop Setup Issue
- Linksys WiFi Extender Not Working
- Linksys Extender Not Connecting to the internet
- Linksys Port Forwarding Not Working
- Linksys Router Red Light
- Linksys Velop Node Blinking Red Or Connected But No Internet
If you are facing any issues then please contact us, and we will be happy to help you.