How to Setup Linksys WiFi Router: Step-by-Step Beginner’s Guide
Linksys offers a vast variety of wifi routers. Every router serves specific coverage requirements and is suitable for homes and offices of different shapes and sizes. But no matter which Linksys wifi router you pick, each one will provide you seamless connectivity throughout. With Linksys routers by your side you are never going to face an issue of lag or buffering, intermittent internet connection or slow speed. But to make the best use of your Linksys router, performance of first time setup is non-negotiable. As only after a successful setup, you’ll be able to enjoy the benefits of your Linksys router. So to help you with the same, in this guide we’ll be sharing the step by step Linksys wifi router setup steps.
Prerequisites For The Setup
For a web based setup the requirements are as follows:
Setup Guidance
The setup steps are quite simple and won’t take more than eight to ten minutes for its completion. In case you are not sure whether you’ll be able to conduct them on your own, then do not hesitate to directly take the assistance from the experts. Now let’s check out the quick steps.
✓ Power Up The Linksys Router.
First if you have any existing router, make sure to disconnect it from the modem. Thereafter reboot the modem as well. For rebooting follow three simple steps. First is to disconnect the router from the power source, hold on for a minute and last is replug.
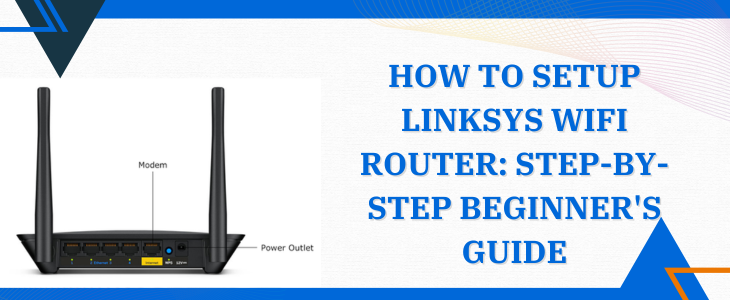
Now if your chosen Linksys wifi router accompanies any external antennas, then attach them to the router. Thereafter, fetch a power adapter. With the help of it, activate your Linksys wifi router. If your router features an On/Off button, make sure it is towards the On position. Now it’s time to show some patience as the router needs to boot up properly. For booting up it may take up sometime. As it completes you’ll get to know about the same through solid light that appears on the front panel.
Moving further, take an Ethernet wire. Its first end moves into the modem’s ethernet port. Whereas the remaining end moves to the Linksys wifi router’s port that is marked as Internet.
✓ Using Smart Device For The Connection
Now for further setup, we need to build a connection between the smart device and the Linksys wifi router. You get two options for it.
For no wiring hassle, turn on wifi on your smart device. To connect to the router’s network use up the details as are scribed on the Linksys device’s bottom panel. The details are also mentioned in the quick user manual. This connection is simple and quick. But we still recommend using the second option which is wired. As it is more convenient as well as reliable. What you need to do is just move ethernet wire from your Linksys device to the smart device port.
✓ Access The Web Browser
Now as the connection between both the devices is successful, open up an internet browser. From hereon move to the address field. In it fill up http://linksyssmartwifi.com. Push enter key. Sometimes this particular detail won’t serve the purpose. So the alternatives that you can try are:
Now to access the smart setup screen on your device, you need to agree to license terms. As you tick mark the same, tap on Next.
Quick Troubleshooting Guide
In case the setup screen doesn’t pop up, then you need to reset your Linksys router. To do so, just nudge down the reset key for not less than six seconds. The router will reboot itself, so you need to re perform the above-written steps.
On the other hand if you get a pop up saying Your internet cable is not connected properly then you just need to troubleshoot the same by following the on-screen instructions one by one. After completion hit Next.
If you are a DSL user then you need to give in some necessary information as is given to you by your Internet Service Provider.
✓ Follow Prompts For Setup Completion
First on your screen you will get a pop up of Updates. Here the automatic update option is ticked up by default. But if you do not want to let your Linksys router update the firmware automatically then you can enable this option and tap Next.
Now it’s time to name your wifi network. Also assign the password. Thereafter tap Next. Moving further, connect to the new wifi network and tap Next on your device’s screen. Finally, you now need to assign the password to your Linksys router. Keep it unique and uncrackable. Finally as you do so, the window pops up saying your router is set up and will also give you the preview of all the details. What you need to do is tap on Next. Here you are ready to enjoy the seamless wifi connection.
Note:
To not face the connectivity issue or poor signal strength issue you need to ensure the correct placement of your Linksys wifi router. The experts recommend placing the router in an area where there is proper ventilation. Further placing the router away from electrical and metal objects as well as away from various physical obstructions like huge concrete walls can amp up the overall wifi connectivity experience. Moreover if you choose to place the Linksys router on some higher surface like a table top or on a shelf then you’ll be able to receive uniform coverage and better signal transmission. Last but not the least, placement of the router in a central area of your home is suitable for reliable connectivity.
